Your brakes are the most powerful speed-changing devices available. Regardless of how much power you make, even the most mediocre brake system can convert speed into heat quicker than your powerplant can turn fuel into speed.
Upgrading your brakes represents a highly effective way to make your car perform better. The results? Faster laps and more fun.
But brake upgrades don’t always come in neat packages. Sometimes they’re limited by budget or parts availability.
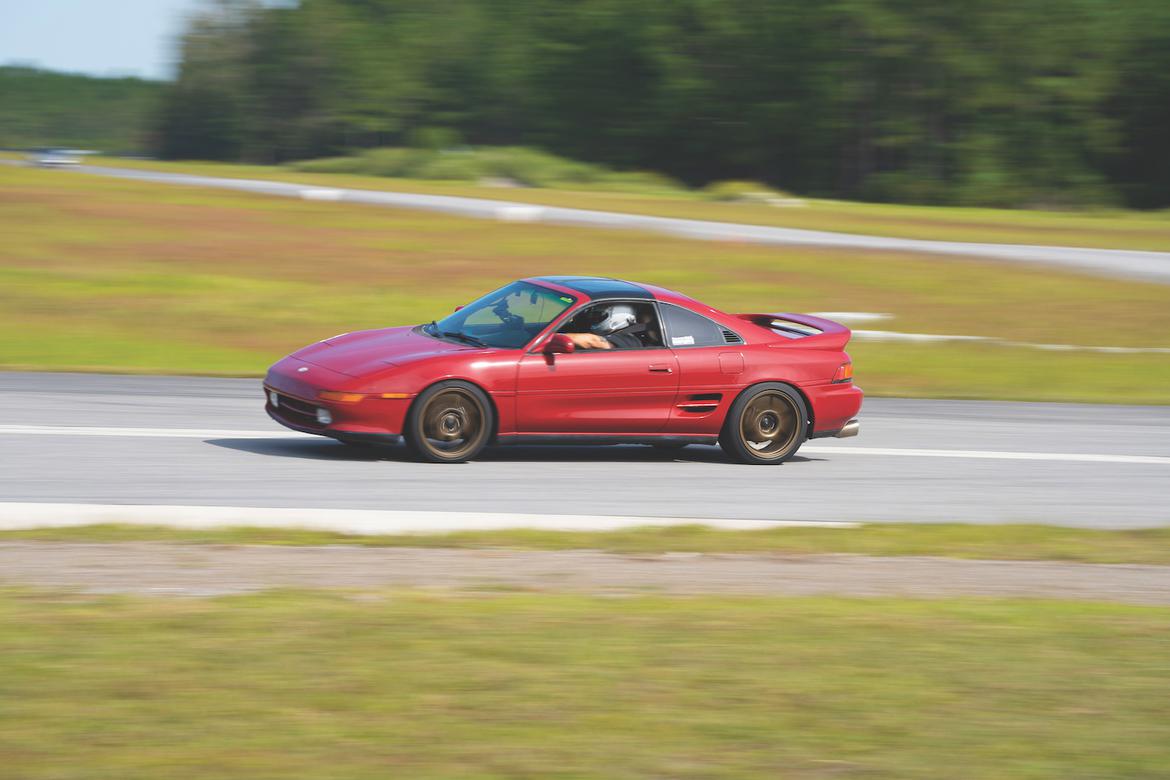
Such was the case with our 1991 Toyota MR2 Turbo. While a highly regarded car, it simply isn’t served by a large selection of “off-the-shelf” upgrades available–whether it’s brakes or most anything else. But our journey to better brakes shows how anyone can identify and then remedy the situation, even when that clear path or deep knowledge base doesn’t really exist.
So let’s dig in.
To Start, We Can’t Stop
The brakes found on the second-generation MR2–particularly early cars like ours–are, in a word, lousy. Even on the high-performance Turbo models, the original brakes barely measure 10 inches in diameter. Then add single-piston calipers and pads around the size of a saltine cracker.
Before making any changes, we ran our MR2 at the Florida International Rally & Motorsport Park for some baseline laps. And those laps were quite sketchy when it came to braking. Initial application felt vague, and fade appeared almost instantly as awful fluid compressed old pads.
We could manage an aggressive lap–like, just one–but we really had to pick and choose our braking opportunities since every hard pedal application was essentially a roll of the dice.
We knew we could do better.
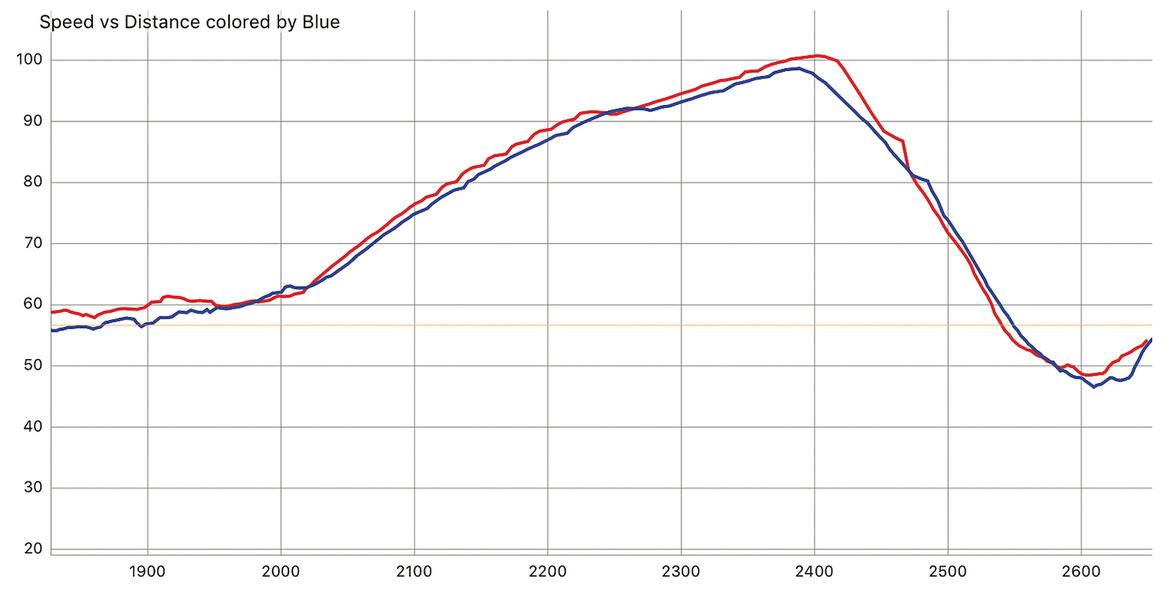
Our MR2’s performance through just one corner shows how much the old brakes were hurting us. The swollen trace of the old brakes (blue) shows imprecise initial deceleration. The EBC trace (red) shows much more aggressive and linear deceleration, with forces that quickly surpass the stock brakes.
While we won’t go too deep into the physics equations here–we’ve got plenty of previous editorial that exhaustively covers the science of how brakes work–suffice it to say that when it comes to brakes, size matters. Given that their primary functions are to turn kinetic energy into heat, then somehow shed that heat so they can absorb more, properties like mass and surface area are key. Additional size also means additional leverage for the brake rotors to act upon.
So, bottom line, tiny brakes are at a big disadvantage when it comes to serious–or even casual–high-performance work. Larger brakes would mean more laps at speed before having to back off.
Hitting Refresh
But instead of immediately throwing huge brakes on our classic sports car, we first wanted to maximize our existing setup. Those tiny 10-inch rotors looked comical inside our 17-inch König wheels, but could fresh pads, rotors and fluid make a difference? We started the process with a set of pads and cryogenically treated rotors from EBC.
Our pad choice was EBC’s Yellowstuff 3068 compound, which is the brand’s most popular option worldwide. While no brake pad can do everything, the 3068 is a high-performance compound that’s track capable for the weekend warrior who doesn’t want to change pads for an event.
But there is a tradeoff: You can’t just pop in these pads and go, as they like to be properly bedded in. But once they are, they’re said to provide good feel on the street and good fade resistance on track.
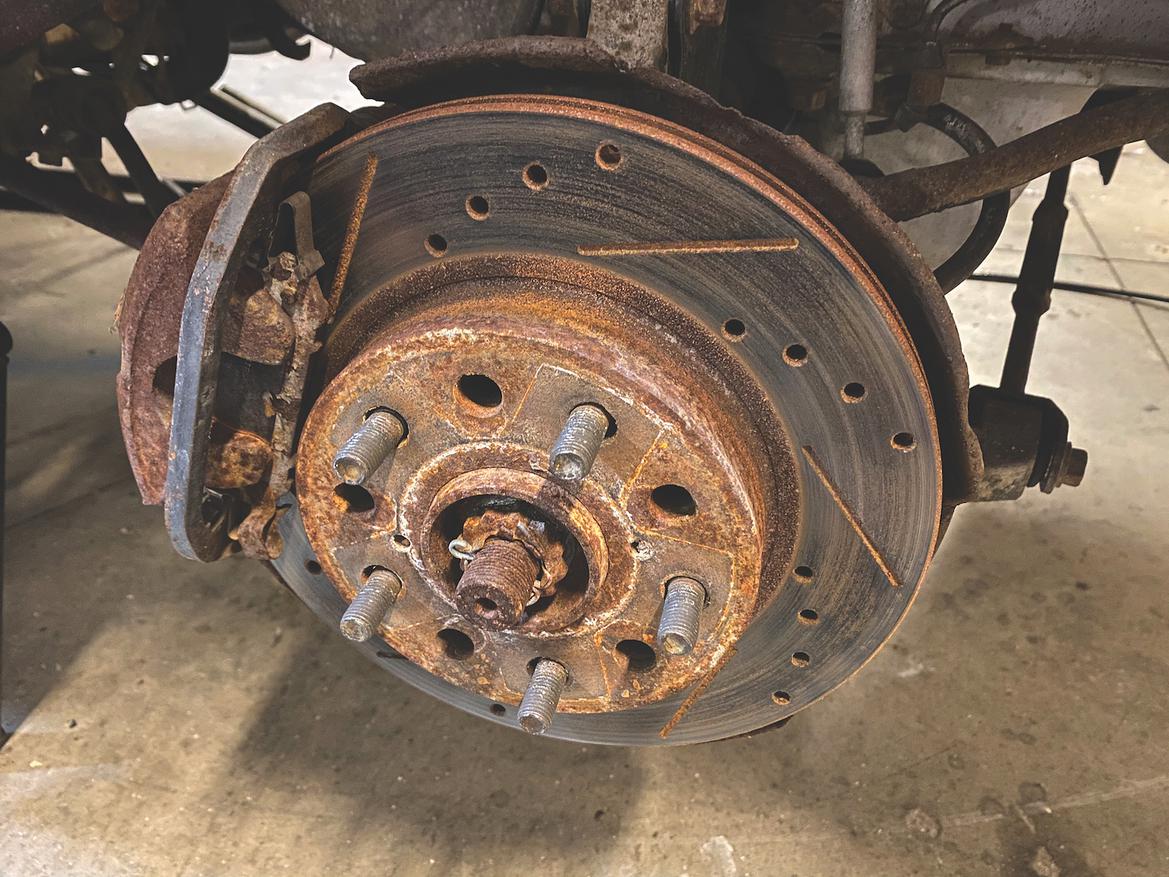
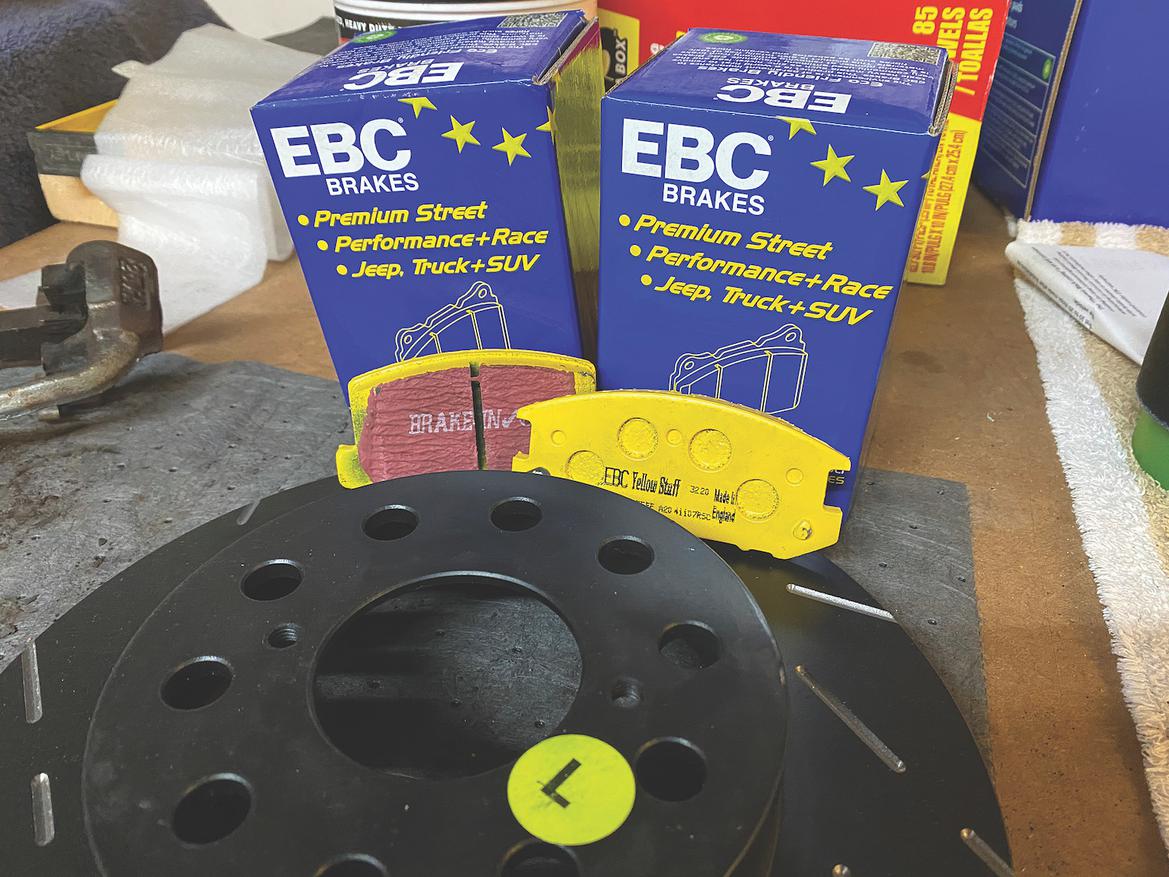
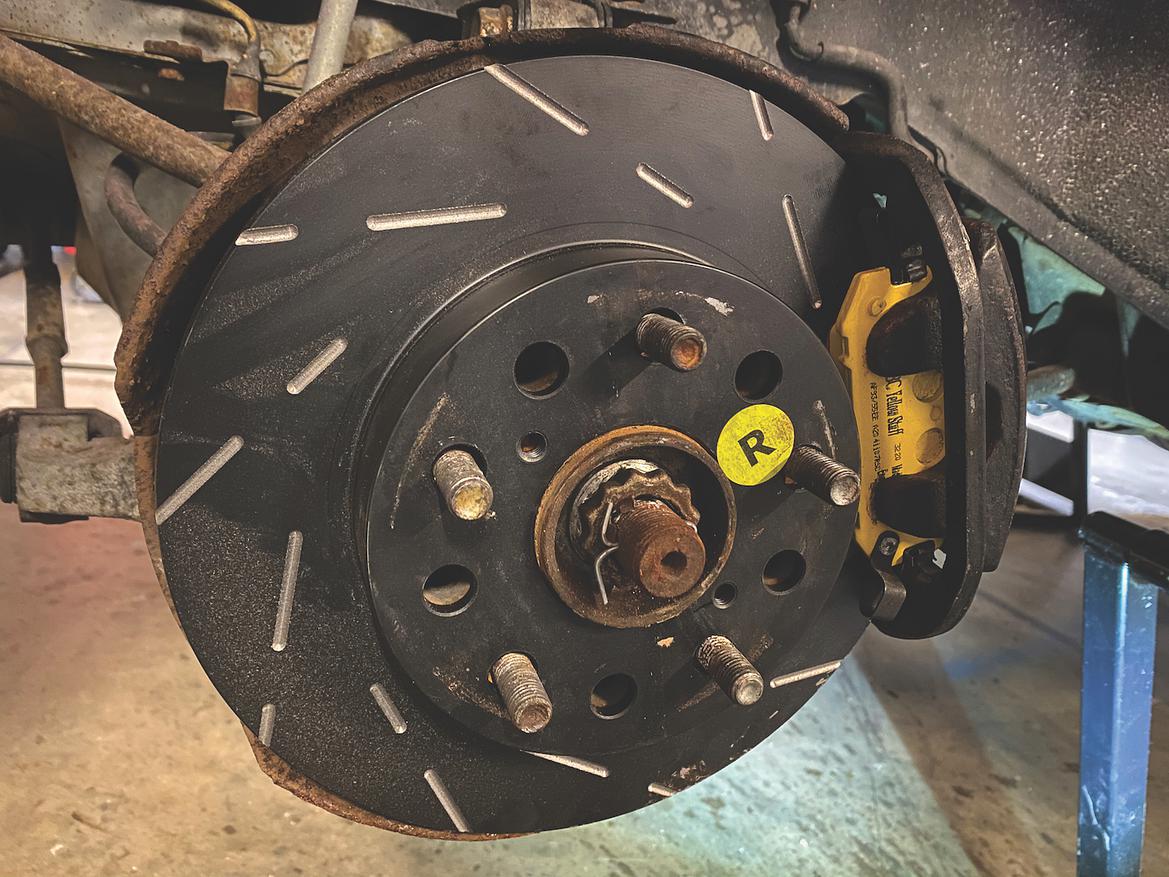
Our original brakes looked like they came off an abandoned mine cart. Fresh fluid–a tester only costs a few bucks–plus new pads and rotors from EBC gave our Toyota MR2’s brakes a new lease on life while retaining stock dimensions.
To give our pads a fighting chance of beating the heat, we paired them with a set of EBC’s cryogenically treated rotors. Cryo treatments are popular in brake applications because, when performed properly, they can increase the hardness of the rotor, which decreases wear and extends life.
Think of cryo treatment like high-delta heat treatment. In conventional heat treatment, metal is heated to a specific temperature–dependent on the type of metal and the exact nature of the heat treatment being performed–at which point the atomic lattice structure of the material changes and becomes more ordered than “raw” metal. The temperature is then reduced to ambient at a specific rate to lock in that stronger structure.
Now, that’s a grossly oversimplified explanation, and heat treating is a broad science that can affect metallic structure in highly specific ways, but that’s the general process at work.
Improper heat treating can produce metal that’s extremely hard but very brittle, like glass. Or it can deliver extremely soft metal that’s difficult to fracture. Neither is good for brake rotors, so we’re glad there are folks smarter than us who know what they’re doing.
With cryo treating, the process is similar, but instead of reducing the temperature to ambient during the quenching phase, the temperature is reduced to well below zero, usually with a medium like liquid nitrogen. This further hardens the material and increases overall durability, something these rotors are going to need to stop a 2800-pound, 250-horsepower car.
We also gave our calipers a thorough cleaning and made sure the pistons could move freely in the bores. Calipers for these early SW20-chassis cars are becoming rare, so simply replacing them could have been time-consuming and expensive. Despite looking like they’ve spent some time at the bottom of a harbor, fortunately ours still seem to work well.
Finally, we replaced our aged brake fluid, which had the consistency of Dr Pepper left in a car while it sat at the airport for a week. Our brake fluid tester–a simple, extremely handy device that measures the moisture content of brake fluid–gave an audible warning when we inserted it into our brake fluid reservoir. (To that point, we didn’t even realize that our tester had an audible warning function.)
Moisture in brake fluid is bad. Even though water is incompressible, it can easily boil under the heat load of even mild braking. And when that absorbed water boils, it produces gas bubbles that are extremely compressible, leading to a condition called fluid fade.
Fluid fade is identifiable by a soft pedal and little braking force. This is not the same as pad fade, however. Pad fade typically results in a harder pedal but no braking force.
Any moisture contamination in your brake fluid is undesirable–never mind the fact that water causes rust–so experts recommend flushing the fluid when the measurable amount exceeds 1%.
A Better Baseline
Armed with our fresh braking system, we performed a thorough pad bedding. EBC recommends bedding in pads against new rotors by gradually heating them through repeated applications.
Don’t perform complete stops, the company notes, but rather accelerate briskly and then brake from about 50 mph to 20 mph. Then repeat.
Several gradual decelerations are preferable to fewer hard braking applications. The pads and the rotors heat at different rates, and by extending this break-in period, you distribute the heat more evenly via conduction throughout the system.
Continue this cycle until you get some telltale signs of pad fade–again, a firm pedal with reduced braking effectiveness. Then allow the brakes to cool to ambient over an extended period by driving for a bit with minimal brake application. Don’t immediately park and allow hotspots to form.
Once the brakes were fully bedded, we headed to The FIRM for some baseline laps. Much better. We could actually use the brake pedal to balance the chassis a bit during trail braking, and initial application bite felt more positive. The data traces reflected all of this as well.
The lap times improved, too, as we dropped a little more than half a second on a 90-second course. This was largely due to our ability to hold throttle longer in two key straights since we knew we had the braking capacity once it came time to erase that speed.
But the braking components’ sheer lack of surface area and mass was still working against them. While the pads produced good friction against the rotors, those tiny discs still had a hard time dealing with all that heat. As a result, fade crept in within a couple laps.
With a hot lap/cool lap alternating cycle, we could stay out for longer sessions, but back-to-back hot laps quickly overwhelmed the small brakes’ capacity. For a fun street car, autocrosser and very occasional track car, this might have been an acceptable compromise, but for a car we want to really run on track, we needed more.
Our Big Brake
Look, it may sound trite to say that simply bolting on big brakes made everything better on track, but few upgrades can make such an improvement–assuming, of course, you’re overheating your stock rotors. There’s just an invincible feeling that accompanies a firm pedal with great bite and easily modulating braking force that stops a car on a dime lap after lap.
The catch: There hasn’t exactly been an off-the-shelf solution for bolting big brakes onto the SW20-chassis MR2.
However, some parts from other cars can be adapted. Maxda RX-8 and fourth-generation Toyota Supra rotors and calipers can be made to work, but while they’re large, they’re also quite heavy. Plus, as those cars age out, prices for the parts are going up as well.
So we turned to a boutique manufacturer, Wilhelm Raceworks. Owner Alex Wilhelm produces a slew of hand-built go-fast goodies for the second-generation MR2. One of his most popular hop-ups is a brake kit that pairs multi-piston calipers with custom two-piece rotors.
He offers several big-brake options that vary in price and weight, and we went with the mid-priced kit that uses the Wilwood Forged Superlite calipers. This $2500 kit would give us four-piston calipers front and rear, along with 12.19-inch-diameter rotors at each corner of the car. The bolt-on kit also includes custom lines, rotor hats and mounting adapters.
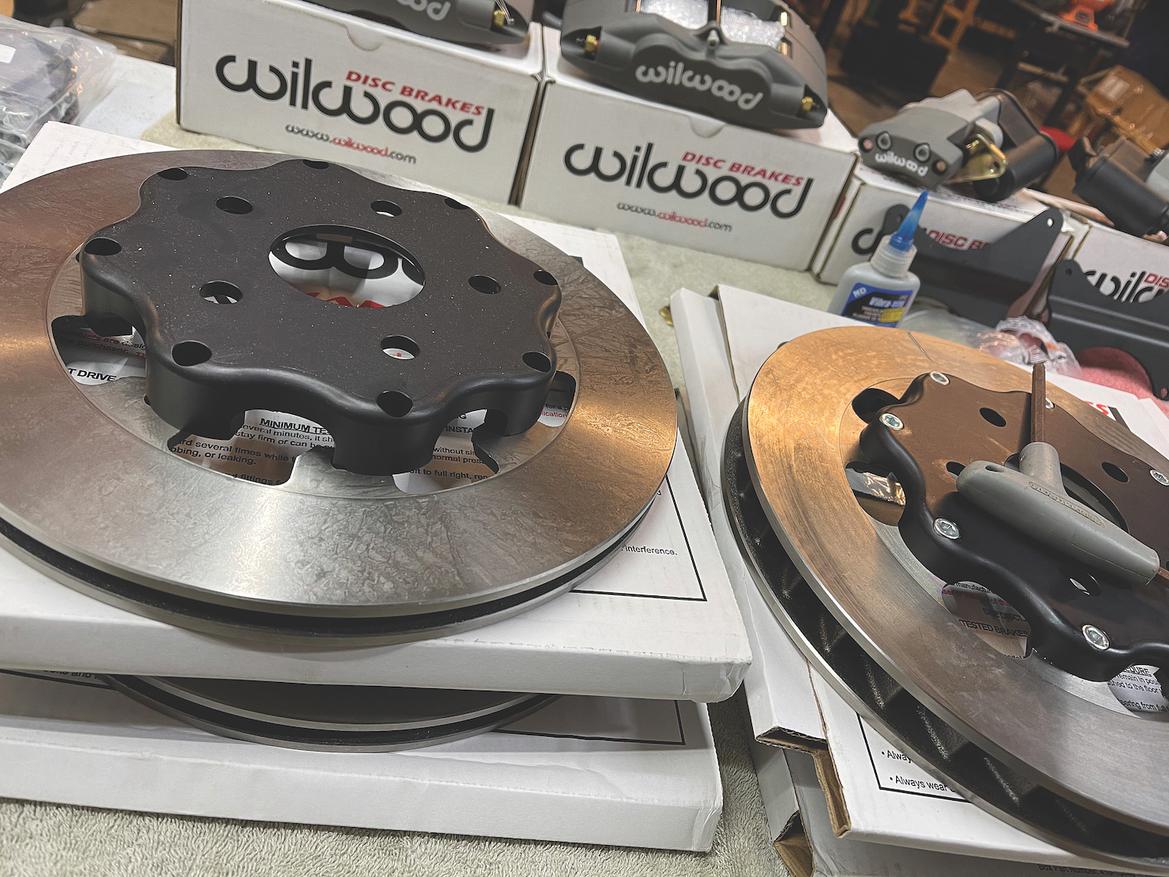
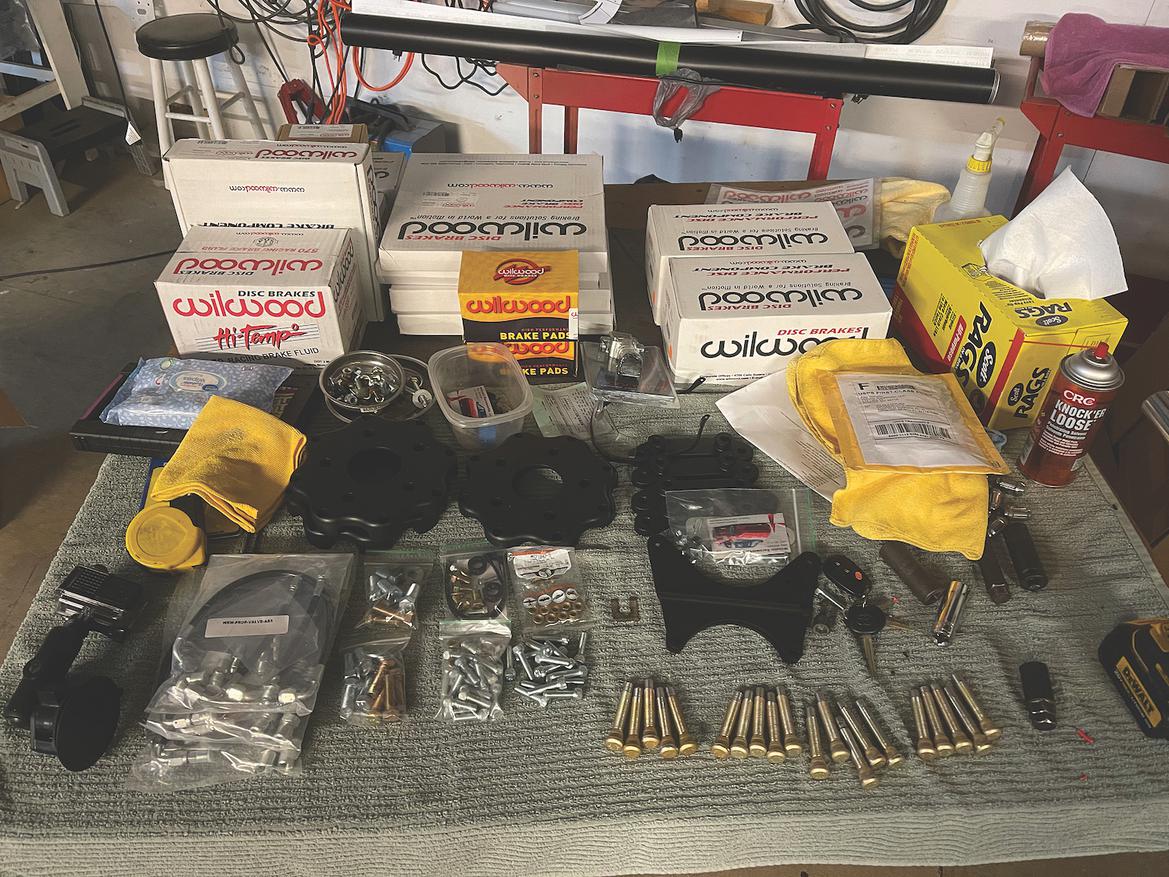
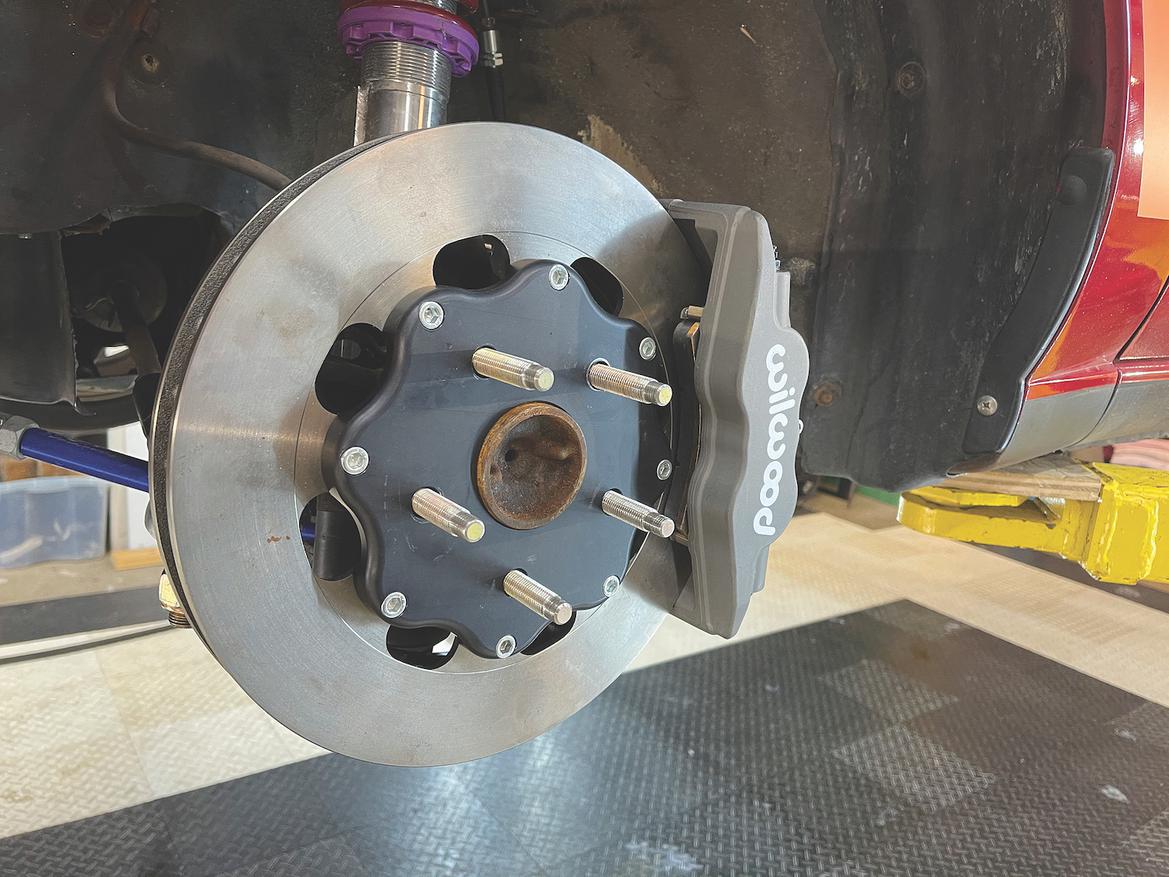
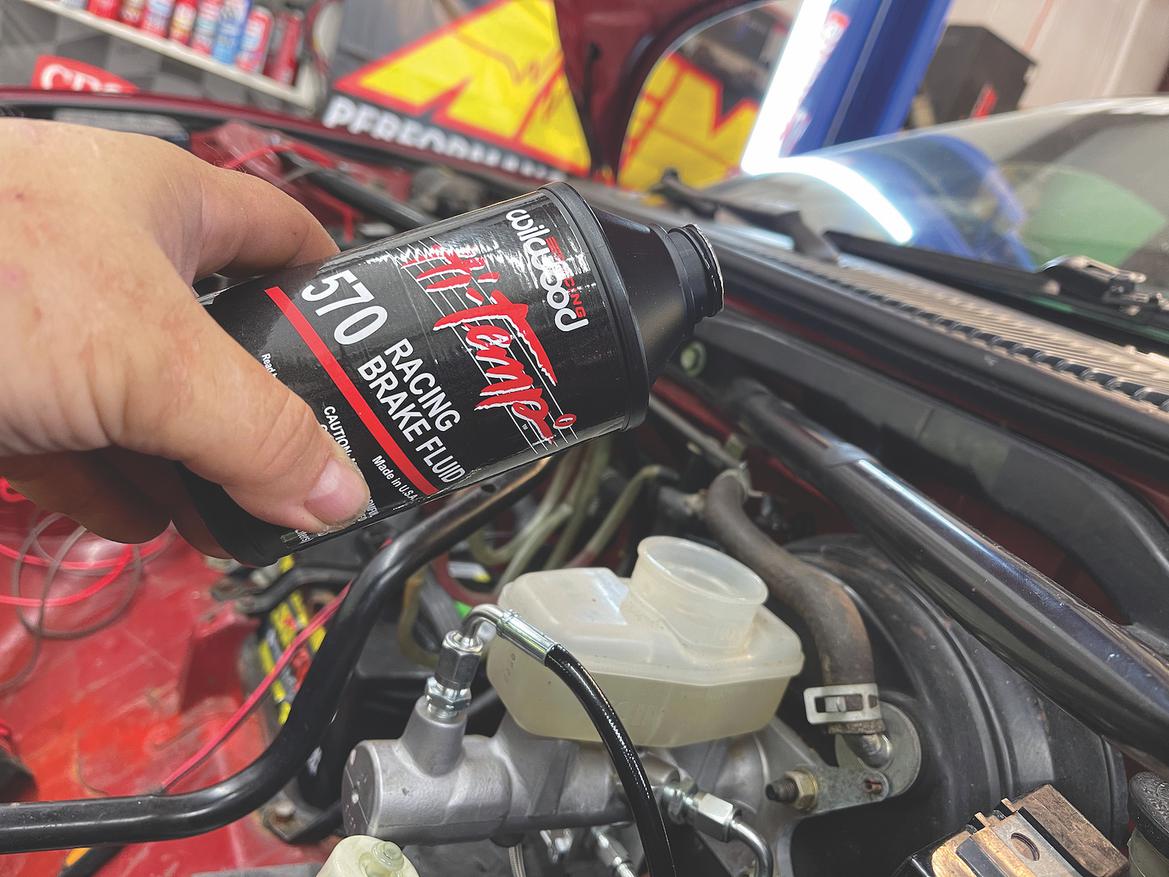
Time to get serious with a modern big-brake kit from Wilhelm Raceworks: bigger rotors for more heat management, swept area and leverage, plus lighter, multi-piston calipers. The Wilhelm kit includes everything needed, including the custom brackets, making this a bolt-on operation. Then we finished it off with a good, high-temp fluid. To fine-tune the balance, we replaced the stock proportioning valve with an adjustable Wilwood piece.
Wilwood, whose components we successfully used on our C5 Corvette project, is a big supporter of kits like Wilhelm’s that use its calipers and hardware. “For us to stock adapter kits for cool but niche cars wouldn’t be a good business decision for us,” Wilwood’s Michael Hamrick tells us. “But we’re huge fans of small-volume manufacturers who can service their customers by adapting our off-the-shelf products to work for their applications. We do whatever we can to make it easy for specialists to integrate our products in as many applications as possible.”
Another cool feature: Even though the 12.19-inch Wilwood calipers feature more than 40% more surface area than our stock rotors, the setup weighs more than 4 pounds less due to extensive use of aluminum and modern manufacturing techniques. More area for friction production and heat dissipation is a good combo.
Bolting on the kit is a snap, and any complications will be due to the age of the factory hardware. The Wilhelm-built parts fit both the Toyota and Wilwood components like a glove, but be prepared for your 30-year-old brake fittings to be soft and rusty. Replacing as much of the existing hardware as you can is a good plan.
This is also a good time to fine-tune the brake bias. Mid-engine cars can have tricky brake bias since so much of the weight sits farther back in the chassis, but the bottom line is that the original MR2 Turbo brake bias valve isn’t bad–to a point.
With stock brakes and mild pads, the bias is pretty favorable: the initial ratio is set to deliver about 58% front bias. At around 0.6g of decelerative force, the valve kicks in to deliver more pressure to the front brakes, which become increasingly important as the load increases on the front axle.
When running grippier pads, though, the increased friction and stopping force from lighter pedal pressures don’t allow enough pressure increase at the front wheels soon enough; that’s because brake bias valves are sensitive to pedal pressure and not g-loads. As a result, the mid-engine car now has too much rear brake force. And that means trail braking can be an exciting proposition.
These tendencies are just amplified with a big-brake kit, which produces even more stopping force and can alter the relative leverages produced at each wheel due to the larger rotors. With a big-brake kit, the MR2–particularly with the Turbo proportioning valve–is heavily rear biased, even at moderate stopping forces.
The naturally aspirated MR2 prop valve is better, however, as it offers more front bias, but the truly easy solution is to eliminate the OE piece altogether and install an adjustable one. At $100, the Wilhelm Raceworks prop valve kit–which includes a Wilwood valve, properly sized line, adapters and attachment hardware–provides an easy fix.
With the 12.19-inch rotors and a set of mild track pads, the Wilwood valve’s knee point–the point where it starts restricting flow to the rear brakes–initially equates to roughly 0.5g of decelerative force. And then it begins to progressively bias more force to the front, staying in the ideal bias range past 1.1g of braking force. This means way less dodginess on corner entry and far more linear “roll off” when releasing the brake during trail braking.
As a finishing touch, we flushed the fluid again–we have to do that a lot here in Central Florida–and replaced it with Wilwood 570 DOT4 fluid. With a dry boiling point of–you guessed it–570 degrees Fahrenheit, this fluid gives us a lot of confidence that fluid fade will be off the table for all but the most extreme conditions. If we manage to boil this fluid, we’ve likely made some other horrible mistake we need to address as well.
Slowdown Shakedown
To test our upgrades, we headed back to The FIRM, where we again dropped half a second from our fastest lap times. But that doesn’t tell the whole the story.
While we were able to run a fairly good lap with our improved stock setup, the key word there is “a.” More than one hot lap was too much for that stock-based setup to comfortably manage. In contrast, the Wilhelm/Wilwood combo never felt like it was working particularly hard. With this setup, we’ll run out of gas before we run out of brakes.
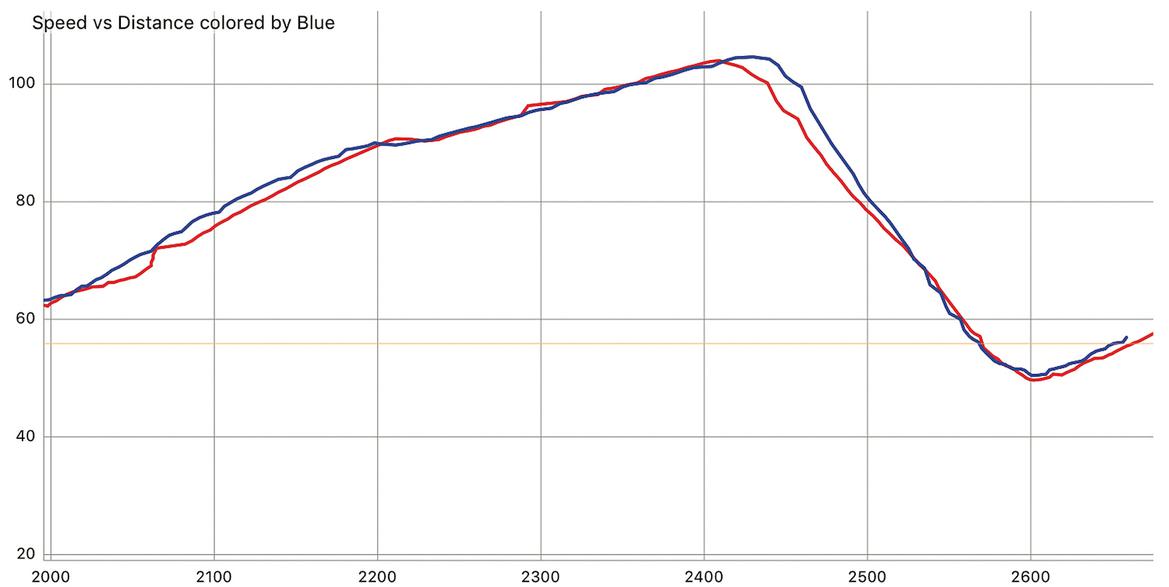
Not only does our big-brake kit (blue trace) show harder stopping forces, but we could experience that performance lap after lap.
Brake feel was also markedly improved, and the data reflected that. Peaks from acceleration to braking were razor sharp, showing instant bite and easily controllable deceleration. Even sub-threshold braking applications painted nice, straight lines, not the curved ones delivered by the less-than-precise modulation abilities of the smaller brakes.
Stock MR2 Turbo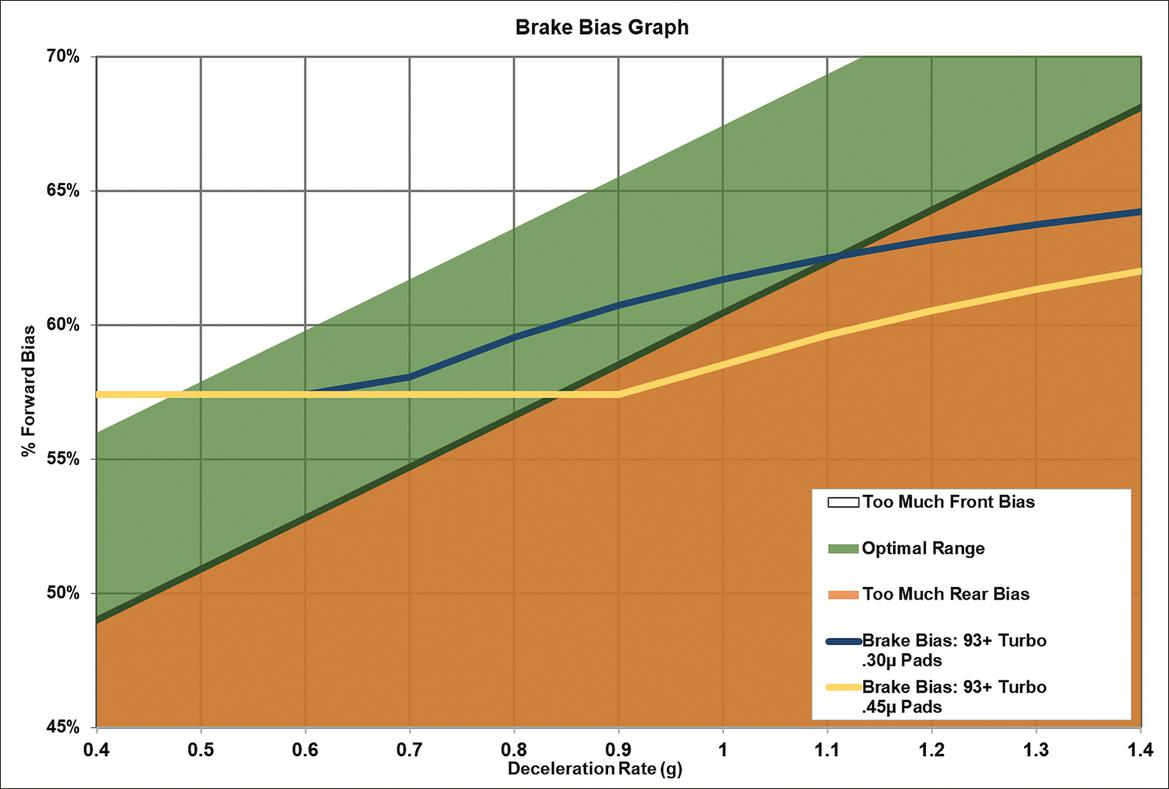
With big-brake kit and stock prop valve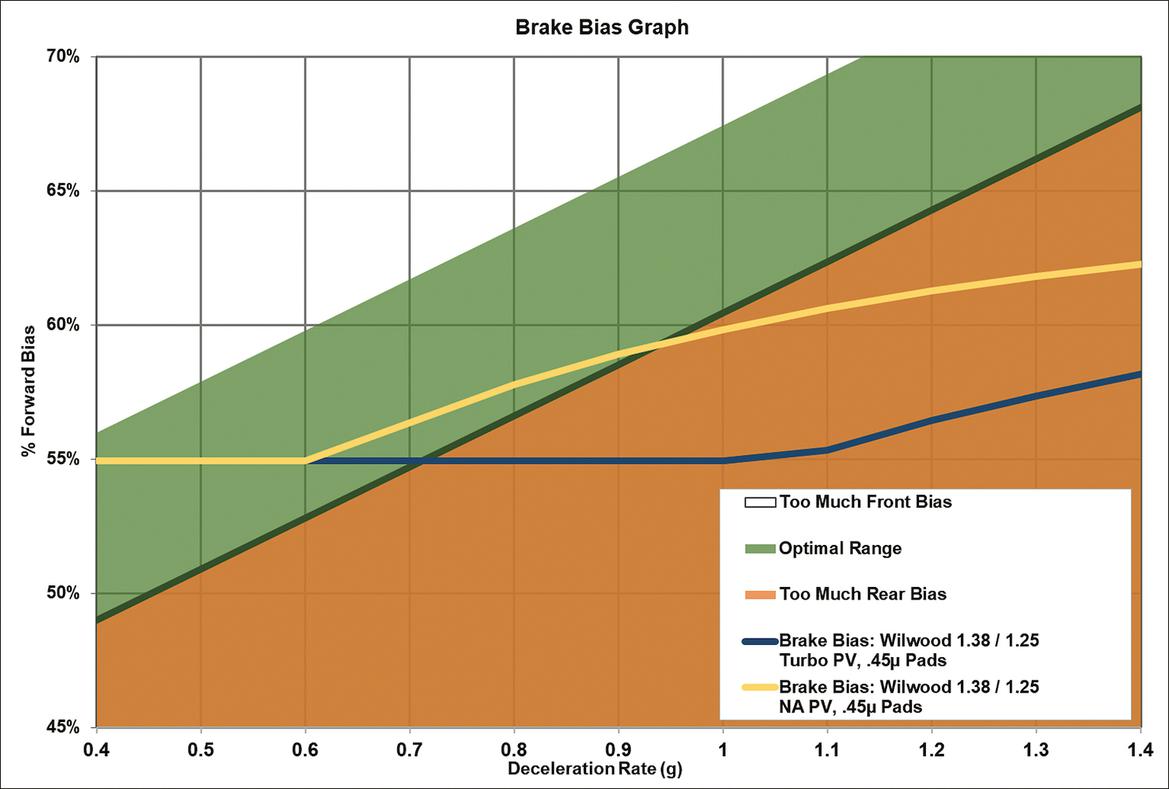
With big-brake kit and adjustable prop valve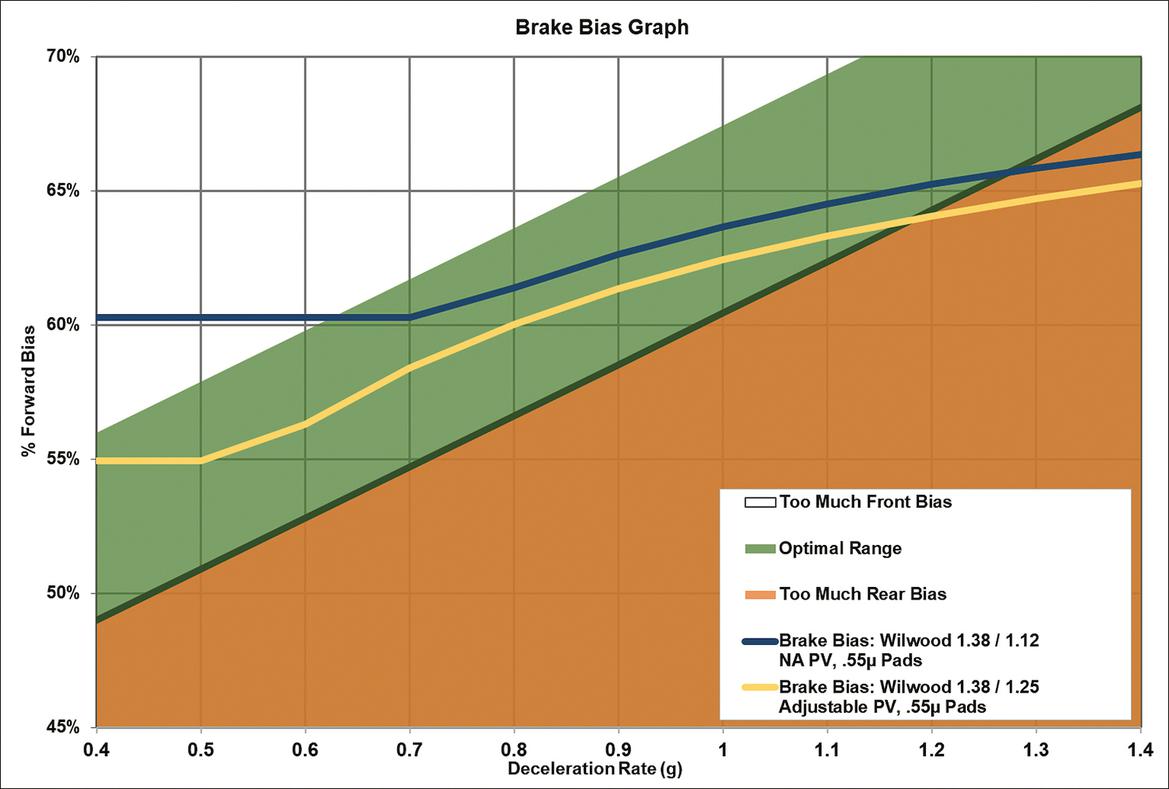
The stock MR2 Turbo proportioning valve works fairly well with the stock brakes. But start increasing friction through pad upgrades, and you can see the bias start to shift to the rear. A big-brake kit, thanks to its increased leverage and stopping power, just magnifies these tendencies and sends even more brake bias to the rear axle. Installing an adjustable proportioning valve allows precise balancing for ideal deceleration.
In short, the upgrade made the braking system a proper high-performance tool that aids the driving experience rather than a limitation to be worked around.
Best of all, it gave new life to an older car with period-appropriate (read: subpar) brakes. The Wilhelm/Wilwood package adds a very modern-feeling braking experience to a beloved classic, bringing one of the car’s few weak points up to modern standards.
Photography Credit: Chris Tropea
